
While growing hops has not been a major commercial endeavor in Indiana (aside from the new Three Hammers Farms in Knightstown), hops can actually grow quite well for hobbyists in our state. Many homebrewers inevitably get the itch to try this out for themselves. After all, it’s just a plant and that little rhizome looks so harmless, what could possibly go wrong? Well, a little planning always helps when it comes to both growing and eventually brewing with your homegrown bounty. I have a Cascade vine that was planted about five years ago and several homegrown wet-hopped batches under my belt. So this post will offer some tips from my experiences….and maybe save you from repeating a few of my mistakes.

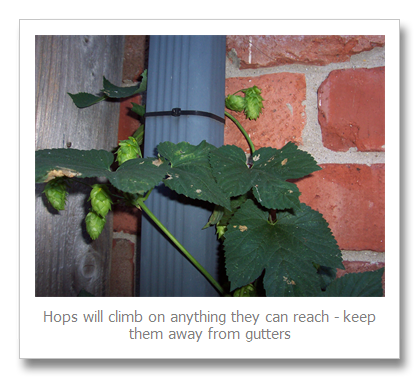
Let’s start with planting your hops. Hop rhizomes (fancy term for root ball) are available at some local homebrew shops like Great Fermentations and online retailers like Northern Brewer and Midwest Supplies each spring. If you know another brewer who grows hops, you can also ask them to separate a rhizome from one of their established plants. If you’re looking to purchase a rhizome, plan to look into this early in the spring. You want to get them planted as early as possible, and supplies tend to dry up rather quickly. Plant your newly acquired rhizome in a spot with exposure to plenty of sun from the south. Brewers who are handy and looking for a project can construct a proper trellis for the hop vine to climb on, and equip it with a pulley system and other features. Or if you have a two story house and prefer the lazy way out like I do, a simple nylon rope run from the roofline to an anchor on the ground will get the job done. The roofline will provide a natural barrier to keep a healthy plant from spreading into unwanted areas, but try to keep it away from gutters or other structures that might allow it to venture into new territory. If your vine can find a way to continue climbing, it will (and it loves satellite dishes). Back to the rope, make sure to use pretty thick material and definitely don’t use twine. As your vine matures, it will get very heavy and can snap a piece of twine…..not that I’d know anything about that.
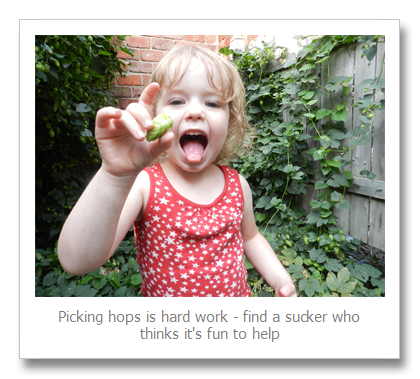
Several inches of mulch around the base of the plant will help retain some moisture during the dryer summer months. Hops will thrive with plenty of rain, but I’ve also found my plant to be surprisingly hearty in dry conditions. The last two summers have brought significant stretches of dry weather, and my vine has required very little watering to continue producing. The first year of growth will produce few, if any, usable hop cones at harvest time, but you can expect incremental increases for the next several years as your plant matures. If you are successful in establishing the initial rhizome, it will take on a weed-like quality and attempt to spread its glory beyond the radius you intended. Keep an eye on this early in the growing season and separate the root wherever you see an unwanted sprout emerging from the ground. The chunk you separate can be discarded, or given to another sucker so they can plant it and learn the joys of trying to control it in a few years.

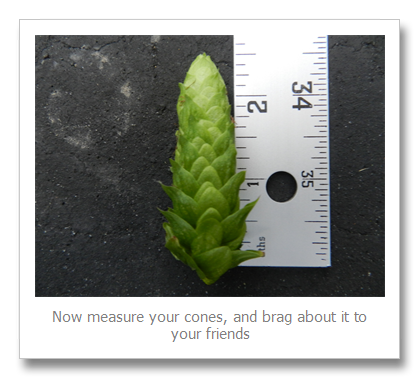
One of the most common questions is how to know when a hop cone is ready to be picked. I look for cones that have developed a pure green color (immature cones will often have lighter sections), have a papery outside feel, and spring back easily when you squeeze them between your thumb and index finger. Hops past their prime will begin to turn brown, feel dry, and have little resilience when you squeeze them. Hops that are too young will still feel moist on the outside and may have sections of lighter color. When in doubt, smell the hop and use your best judgment. If it smells good in your hand, chances are it will smell and taste good in your beer. Deciding when to harvest your hops can be a bit more art than science. The Cascade plant seems to reach its peak in late August, but I’ve heard other varieties need to be picked a little earlier for best results. New buds form throughout the growing season, so whenever you decide to pick there will probably be some that are too young and some that are too old. Unless you have time to be out constantly picking, letting some hop cones go to waste is just a fact of life. One final note on picking hops – wear long sleeves no matter how warm it is. Without protection, the hop vine will subtly scratch and irritate your arms like death by a thousand paper cuts.
To use your hops conventionally, you will need to dry them and then store them in a vacuum-sealed bag to maintain freshness. Or you can just skip the time and equipment needed for this part and make a homegrown wet-hopped Harvest Ale (or two). Taking this route just requires you to pick the hops and use them in a batch of homebrew within 24 hours. When planning your recipe, keep a few things in mind:
- The weight of wet hops is mostly water and not comparable to the dried and packaged hops you normally use. I generally use a rule that 5 ounces of wet hops are the equivalent of 1 ounce of dried hops (based on an assumption of 80% weight from water), but I’ve heard and read other suggestions this ratio should be figured as high as 8 to 1 or even 10 to 1.
- The mass of hops you are about to use will soak up a lot of wort. Upsize your recipe to make sure you end up with the desired final volume. This can be a bit challenging if your equipment is optimally sized for 5 or 10 gallon batches.
- If you don’t normally bag your hops, I would strongly recommend it in this case. Unless you enjoy massive clogging issues when attempting to siphon out the finished wort to your ferementer. Learn from my mistakes.
For the 2013 Harvest Ale, I solicited a little assistance from Tim Palmer….which conveniently came with access to Tim’s Columbus vine (and 20 gallon Blichmann brew kettle). We combined our resources for a full 2 pounds of fresh Cascade and Columbus cones (about 4-6 ounces of regular hops depending on the ratio you go by). Since the Columbus plant is still fairly young, nature dictated about a 3 to 1 ratio of Cascade to Columbus, so this batch was pretty heavy on the Cascade. We sized the recipe for 12 gallons to give plenty of leeway and ensure we’d each walk away with a full 5 gallons. When it comes to deciding how to utilize your hops, I recommend buying pellet hops for the bittering addition. You might be able to take an educated guess at the alpha acid content and use your homegrown fresh hops for the bittering addition. But using this strategy will leave you guessing on the actual IBU count, and why waste all that flavor on bittering additions? The full 2 pounds of our stash was added with 5 minutes left in the boil, a point where any miscalculation in IBUs would be negligible. Likewise, I have not attempted to use wet hops for dry hopping in these beers. While I have no concrete reason to believe there would be any sanitation issues, there is still the issue of additional wort loss and you’re already walking a fine line of overkill from green plant flavor. But I’d love to hear from anyone who has tried it and would like to share how it turned out.


I’ve experimented with wet hops in Black Rye and Amber ales, but your best bet is probably to start with a typical IPA malt base with minimal Crystal malt additions. Use the neutral malt base to get a feel for the characteristics your hop variety will lend to a beer, take good notes, and decide what modifications will fit your personal tastes in future batches. Whether kegging or bottling your wet-hopped beer, the obvious rule of the fresher you drink it the better it will be definitely holds true. I’ve tried setting some bottles aside in the past to have some available for competitions. Unless your competition is within a few months after brewing, don’t do it. These beers do not hold up well – just tell everyone how awesome it was and how many awards it surely would have won if you could have just stopped drinking it.
The taste and aroma differences in fresh hops can be difficult to describe if you’ve never tried one before. Our IPA was dominated by Cascade hops with contributing Columbus additions. I would normally expect a beer featuring these hops to be heavily citrus focused with a strong emphasis on grapefruit. This characteristic is still found in the wet hop beer, but is less dominant. I get accompanying notes of melon and lemon, and the flavors just “pop” throughout your mouth in a unique way, leaving your tongue with a thick feeling of hop resin as you swallow. I’m not sure where this comes from, but one other interesting note is these beers exhibit a nice creamy mouthfeel to support the overall sensations. On the down side, you will get a distinct green plant flavor and aroma when using large quantities of wet hops. So depending on your tolerance for this character, some brewers may want to be cautious about overloading their personal batches. Using a full two pounds is more akin to throwing caution to the wind.
In summary, hops are pretty easy to grow and may actually be more challenging to control. There is always something intrinsically rewarding about brewing with ingredients harvested from your own backyard. If you’re thinking about getting started, I hope you found this information useful. If you’re an experienced grower and brewer, we welcome sharing your own tips in the comments below. Happy growing, picking, and brewing!
Nathan


No comments:
Post a Comment